This article is continued from the page: How to Test Your Model Bridge.
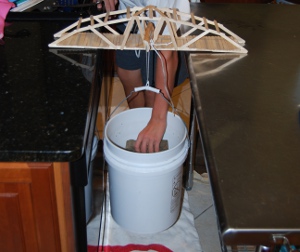
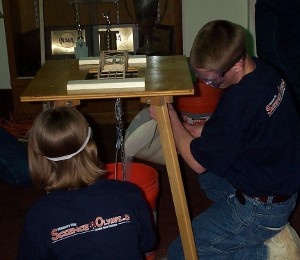
The above photos give you several examples of the hanging bucket method used in real life situations. This method is fairly versatile, and you can adapt it to fit your needs. Please notice that in each of these photos there is a loading block that fits into the bridge, which in turn suspends the bucket with various hardware. You can use this method to load the bridge as shown here, or place the loading block on top of the bridge.
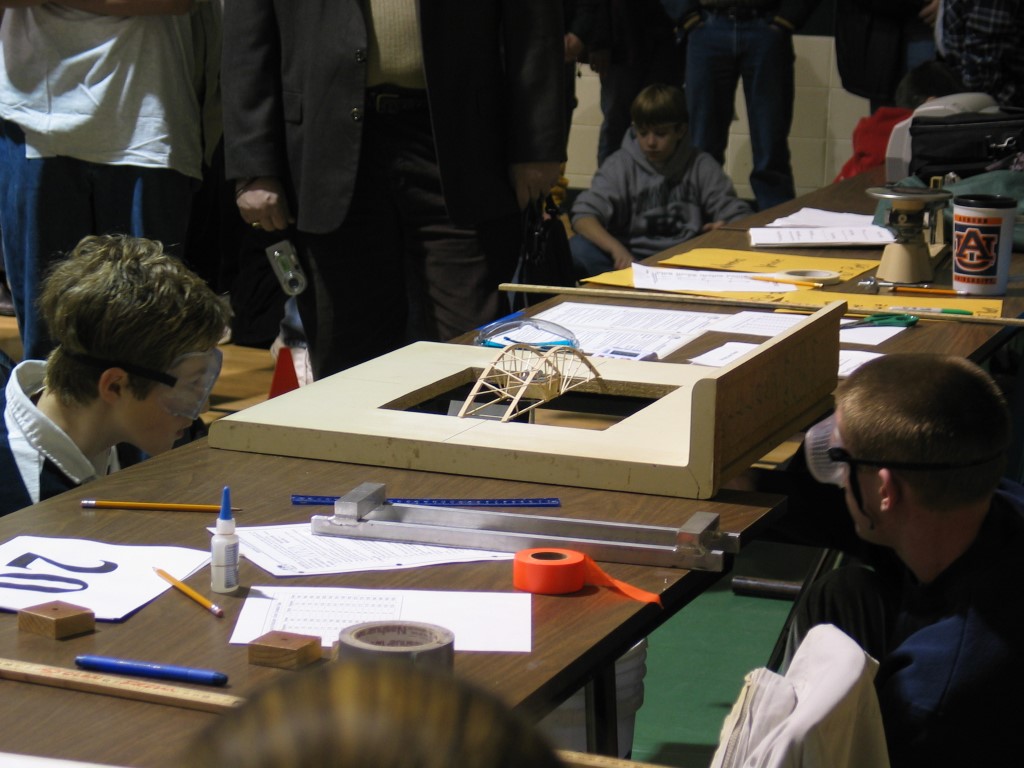
In order to be able to suspend a bucket below the bridge, you have to get the bridge high off the ground. You can use two tables pulled close together, or a table with a removable leaf. Or you can use a specialized table with a hole cut out in the center made just for this purpose.
Filling the Bucket
Probably the most common weight to fill the bucket with is sand. However, you can use water, weights, gravel, or any other heavy object. Sand is cheap and also is easy to pour, although it can be messy. You definitely have to clean up sand after an event.
The hanging bucket method sometimes creates a problem when loading. The bucket has a tendency to swing from side to side as you fill it up. To counter this, pour your sand or gravel directly into the center of the bucket, don’t worry about trying to fill out the sides. Also, you can steady the bucket with a free hand from yourself or a partner.
Because the bridge is higher with this loading method, you can observe the bridge closely while it is being loaded. Just remember to wear safety glasses to avoid having wood splinters in your eyes.
You never ever want any part of your body to get below the bucket when it is being filled. Keep your fingers and toes well away.
Hanging Bucket Pros
- Load from deck or top of bridge
- Use a variety of weights: sand, rock, water, weights
- Uses inexpensive materials
Hanging Bucket Cons
- Can be messy
- Potential for dynamic force causing premature failure
Requirements
- Loading block, rod, and rope or chain
- Table or way to lift bridge up for bucket clearance
- Bucket
- Sand, small rocks, water, or other heavy and dense objects
Tips for Using Sand
If you have to pour sand into a bucket to load your bridge, here are a few tips:
- Pour quickly but steadily
- Pour into the center of the bucket
- Keep the bucket steady
- Never stick any fingers, arms, feet, or legs under the bucket
- Don’t bump the testing platform
When loading by the hanging bucket method, is there a best way to place the block? Spread evenly on each side or as a diamon, which places the force on the center beam as tested on Bridge Designer. I ask because it seems easier to make sure the weight is perfectly centered with the diamond configuration, but may hold more weight with the square approach.
Carol, I like to think of the Bridge Designer diagrams as a single side of the bridge, not a center.
If you have a square loading block and place in in a diamond on top of the bridge, you will actually be concentrating the load on a smaller area of the bridge than if the loading block is square to the sides.
Hi! I teach a bridge buillding class at my high school in NYC. We’ve used the hanging bucket method in the past, by putting a block into the bridge and then connecting the bucket. So the majority of the force is on the roadbed. Is it better to put the block on top of the bridge? What do you recommend?
Thanks!
Sarah, have you found that the bridge often fail by the loading block pulling out?
If the force from the loading block is not effectively transferred to the bottom chords, then it would be better to hang the bucket from the top of the bridge. This would happen most often if the bridge was too much wider than the loading block.
Hi! We built your 13.5 inch Warren and Howe truss bridges and we are ready to test. What increments of weights do you suggest we use? Increments of half pounds, one pound, five pounds? Thanks for your help.
Your plans were easy and fun to follow.
You can start with heavier weights, and progress to lighter weights. I would even start with a 20 pound weight if you have it.
we did the howe truss and it held 100 lbs we did the bridge building project and we won we had a kid break it with his weight 0-0